Showing posts with label building. Show all posts

Tuesday, 16 July 2013

hand made roof

for me, as a carpenter, roofs have always been the most interesting, or even the best part of the construction of a house. they always seemed like the most essential aspect as well as the final part that made sense of the building. I really like hand cutting rafters, it doesn't matter how simple the roof, there is always something deeply satisfying about getting to and doing that part.

i'd like to say, from a technical point of view, the more involved they are the more rewarding they are, but I never found that strictly true, some of my favorite roofs have been fairly simple, but it was the aspect of them, the pitch, the size, the overall shape they made that gave the reward.


what I liked about this roof is that it falls somewhere between a chapel and saxon manor house, and if you look at roofs from that period there are a lot of similarities. my most favorite roofs i've made or had a hand in the making of, are those that are part of ancient buildings or those that hark back to them, or echo the ribs and planking of upturned boats (of which there are many scattered across the shores of essex and suffolk where i'm from).


the technical bit

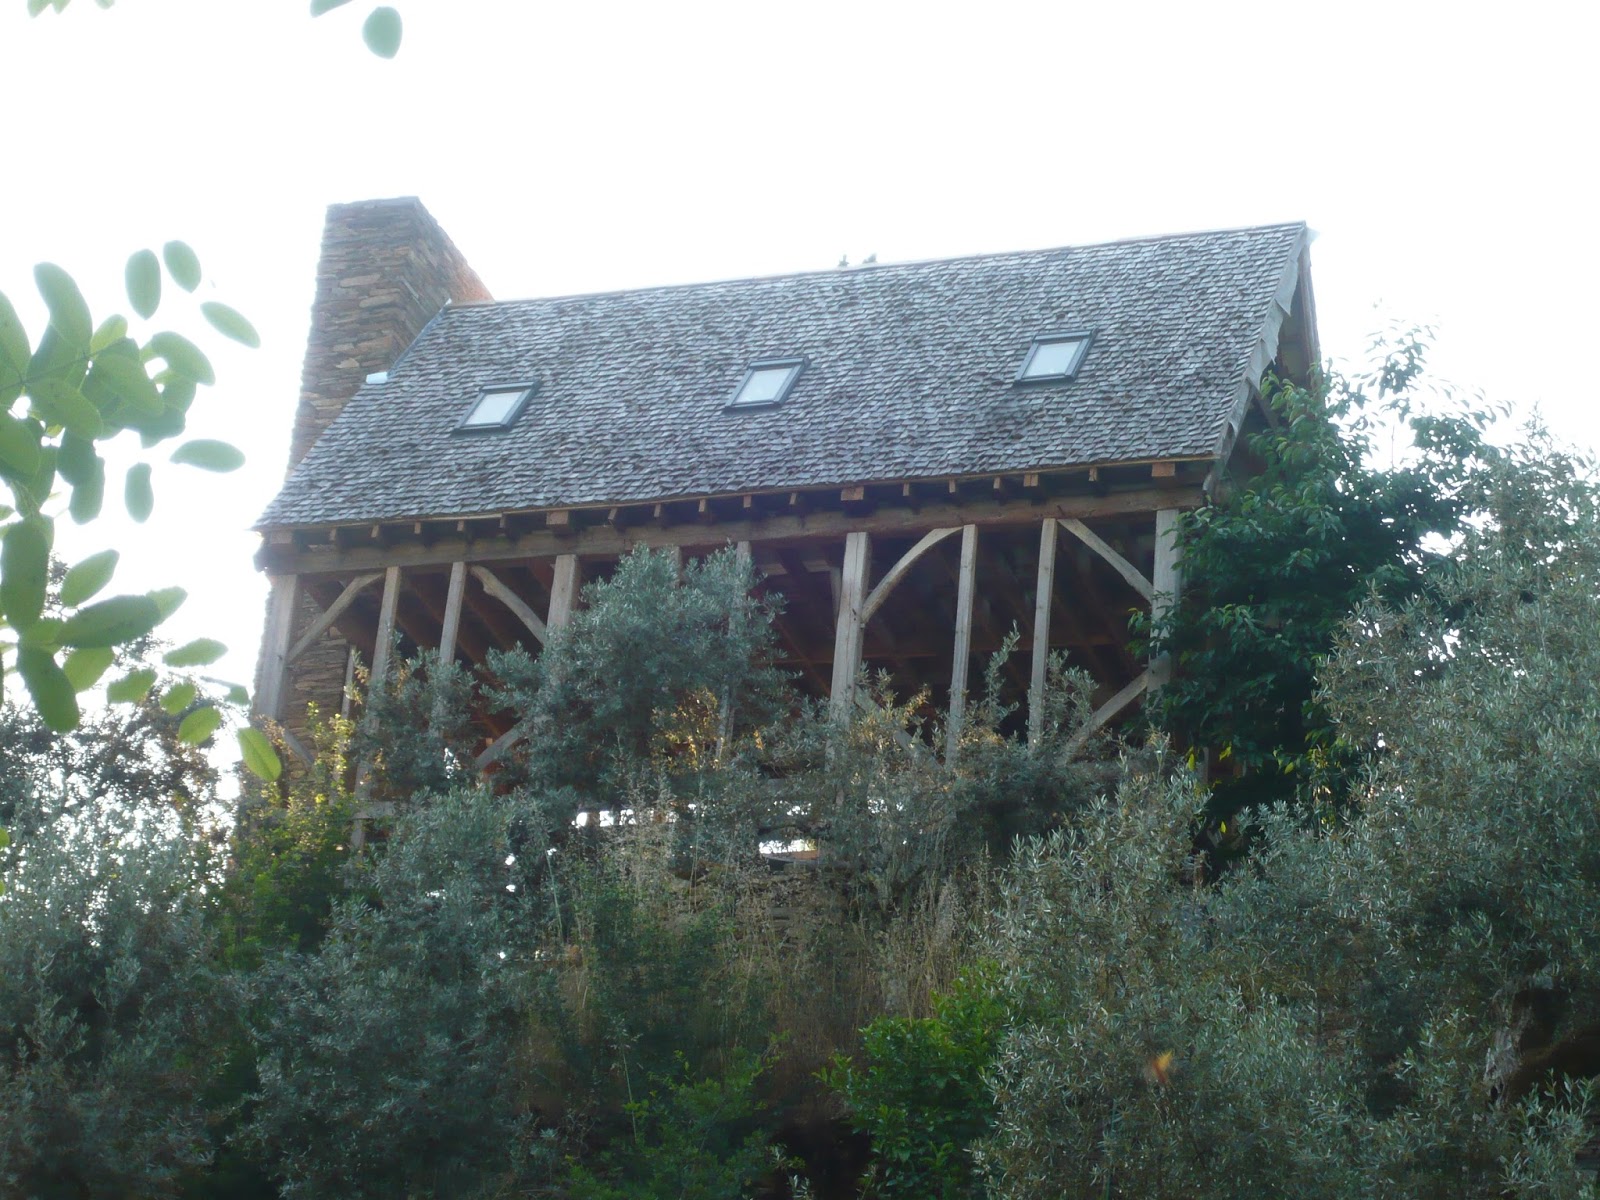
from a carpentry explanation, for the main part, this is a principal rafter roof that includes 4 pairs of principal rafters, with 4 collar ties and 4 pairs of queen posts coupling 2 clasped purlins with 8 windbraces, and 12 pairs of common rafters.


the principal rafters were set in from the outermost edge of the tie beams to accommodate the build-up on the roof of covering materials.

attached to the outermost principal rafters are ladders that over-sail the verges, that will take the barge boards, facias, and soffits.


there is an additional section to the roof that covers the bathroom, known either as a lean to, or a saltbox (depending on where you're from). there is also an over-sail on the back section of the roof to cover the back wall, as the front and back walls are to be made of two different materials and thicknesses.


overlaying the rafters is narrow gauge tongue and groove flooring that acts as sarking, (horizontal and diagonal bracing) and visually creates the ceiling on the under-side.


on the outside, overlaying the that are 2x2" (50x50mm) counter battens, that follow the rafter lines to support the blanket of multifoil insulation, then another layer of counter battens 1/2"  (12.5mm) that allows an air flow.


then overlaying that is the breather membrane which is battened down at a 5" (125mm) gauge to take the triple lapped shingles (shakes).


the chestnut shakes are 15-16" long (thats 375-400 mm in new money) and anywhere from 2 1/2 - 9" wide (57-225mm). the vast majority of them are radially split,


with some bastards, meaning they were cleft from the whole width of timber, often harder to get out (make), hence the name, wider, but with more chance of splitting lengthwise, or twisting, or cupping.


they were nailed on with 20 odd thousand 2"  (50mm) stainless steel ring shank nails to prevent them pulling out and to prevent tannins from both eating the nail (as with bright nails, or galvs) or causing running stains if exposed.


the ridge was covered with several layers of breather membrane over the multifoil, and then a zinc cover nailed down over everything. finally when the courses of shakes ran to the ridge they were covered in walnut and some cherry 1x8x12" (25x200x300mm)  ridge tiles i made from some of the first trees i felled and milled here 4 years ago.


the flashing down the sides of the chimney and in the section where the two roofs meet at the back was done in hand made zinc soakers. which copy the way the velux windows were flashed. alternating tile an a half on the verges and a starter course on all eaves.


the devising of a roof has many considerations, that include function, aspect and design, and for me its visual appeal is born out of those things as much as how well crafted it is. It's the coming together of all these things that makes a good roof, or a good anything for that matter. 

for me, here, it was in part about producing something natural with my own hands, something that hadn't travelled far from the place where the materials had come from (well other than the insulation and windows). to build in the most sustainable, erudite and economic way I can. this doesn't mean not using 21st century products or materials where I feel they are applicable. that, I would suggest, is the essence of good design. use the most appropriate material or most applicable for the circumstances.


i wanted my finish roof covering to work within the context of the building as a whole. the choice of material (the chestnut shakes) was very much in keeping with my original concept for the house, how would someone have built a house of this kind, 500 years ago or more?


its easy to look at ancient frames or brick work or tiling and say well that's not very uniform, or it doesn't fit together perfectly, and forget to allow for the ravages of time, which distort the shape and form from their origin.


it's easy to imagine that tools were not as sharp or good then, or that craftsmen were not as accurate in how they laid things out or fashioned them, you only have to look at the genius of any of the great cathedrals, churches, or any building of status to see how well made things could be. the fact they are standing still speaks for itself.


until the advent of mechanised transport, principally the railways, most domestic dwellings were built in what you could call a vernacular way, they were essentially products of their environments, since the cost of using materials that were not local precluded their use.


It is with this vernacular architecture not only in mind, but in spirit, that house has been devised and built. build with what you have and in the ways that you know best.


maybe we've come full circle? living in a place where the availability of products is limited, fosters creativity born out of necessity, where perhaps the answers to the future, which are the questions of today, lie in the past.


throughout this build, one of the single most determining factors has been to try and achieve the highest build standard I can. coupled with a non-existent budget generally that means hand crafting materials from natural resources that either I have, or have obtained. and so that's how I ended up making and then using somewhere between 10,000 and 11,000 hand riven shingles (shakes) made exactly how they would have been made a thousand years ago or more, and the same way they are still made all over the world.


hand split from rounds of timber, and dressed with an axe to sit on the roof and overlay each other as comfortably as possible.


do they sit down as perfectly as if they were sawn? no. are there a lot of character ones? yes. did I reject many? yes. did it take way longer than even i feared? yes. like more than twice the time I had estimated. difficult to gauge when you'd never made or laid them before though. some of the material for the shakes I had, in the end probably about 1/4, the rest came from friend's lands within a couple of miles. the only difference in how I processed the material and how it might have been processed a thousand years ago, was I used a chainsaw to fell the trees and ring it up, and my truck to haul it out.


i'm not looking to build a historically accurate building in the exact way they were built 500-1000 years ago, but to use the knowledge and understanding our forebears had, and use it in the most expedient way possible. to build a home from the place where i wish to live, a place that is of that place in every aspect. a house of the woods, made from the woods. (in old english) hewan fram se holt - hewn from the woods.


what i am trying to preserve, or bring back, is an ethos, a way of doing things, a way of going about, a way of looking at things in the way they were looked at once before, and a re-evaluation of two things in particular. choice of materials, and the way in which they are made and used.

by crafting your own materials and making things yourself, not only does it give you a different kind of autonomy, and a governing of quality, but it gives you something inside. it is a spirit nourishing thing. a thing that not only allows your soul to breathe but to sing.


there is a beauty in hand made, and man made, that no machine can replicate. the naturalness of lines and materials, the way in which things are put together or contrasted. these are the things of life, the flow of life. and not a replica of it.

i don't want to kid you that its easy, it rarely is, but then nothing worth having ever is. it may take a longer time, and it may not look as rectilinear as store bought products, and those are two big issues when gauging the commercial viability of a building.

there is a point though, where you have to question what you want from a building?  domestic dwellings have only recently, for the vast majority of them, become built or sort after as a financial asset. how they were built previously was more a reflection of a hierarchy of needs, and I truly believe that's the direction in which domestic dwellings need to be designed and built, where bottom line and units sold aren't the driving considerations of construction, but where the considerations are primarily about comfort and warmth, homeliness, and security, a place to grow, store, and cook food, a place to make and house your possessions, and possibly most importantly, a place that gives you a sense of belonging, a place that you really can call home.

Wednesday, 23 January 2013

chim chimeney


mary poppins is one of my favorite films. when we were kids, i was probably six or seven at the time, one thursday afternoon, after school, following a visit to the dentist, on the way to the bus stop, my mum looked up and saw that the film mary poppins was showing (as they called it then) at the cinema. she asked us if we wanted to go? there and then, it started in five minutes.  i don't think we'd hardly ever been to the cinema, if at all. we jumped at the chance. i don't know if she ever took us again, timings i guess were never right. but what a film, it sort of made up for it. its stuck in my memory. the magic of it. chimney's it seemed were like a portal into another world. a world, i think, a lot of us might have preferred to have lived in.


chimney's are central to what most of us think of as home, hearth and home.  a hearth stone is a place where cooking and heating are often located, and the chimney is the device thru which it all happens. things come and go up and down the chimney, flue gasses, hopefully just go up (unless suffering from back-draft) and bees and sometimes birds have a way of making their way down the chimney.


not so long ago, many people used to put heck, or apotropaic marks on the chimney or post supporting the mantle, to keep witches spirits away, particularly to keep them from entering the building thru the chimney.

this is a close up of one of the mantles, i hewed them (made with axes, not sawn). this is one of my favorite things about this building, there's something about the surface marks left by the axe that's like no other texture, this, for me, is the heart and soul of the building. a direct link to the saxon carpentry from essex, where i'm from. hewing, like archery, is a feeling thing. and this is something i like about the whole approach that i've taken to building this house, its gauged, and felt, and as far away from mass produced as i can make it. its handmade and heartfelt.


although romans used ducting to vent flue gases, the concept of chimneys doesn't really exist until the 12th century in england. prior to that fires are vented thru an opening in the roof.

as much as i like the idea of building a smoke house, i want one for preserving meat, fish and cheese, not for living in.


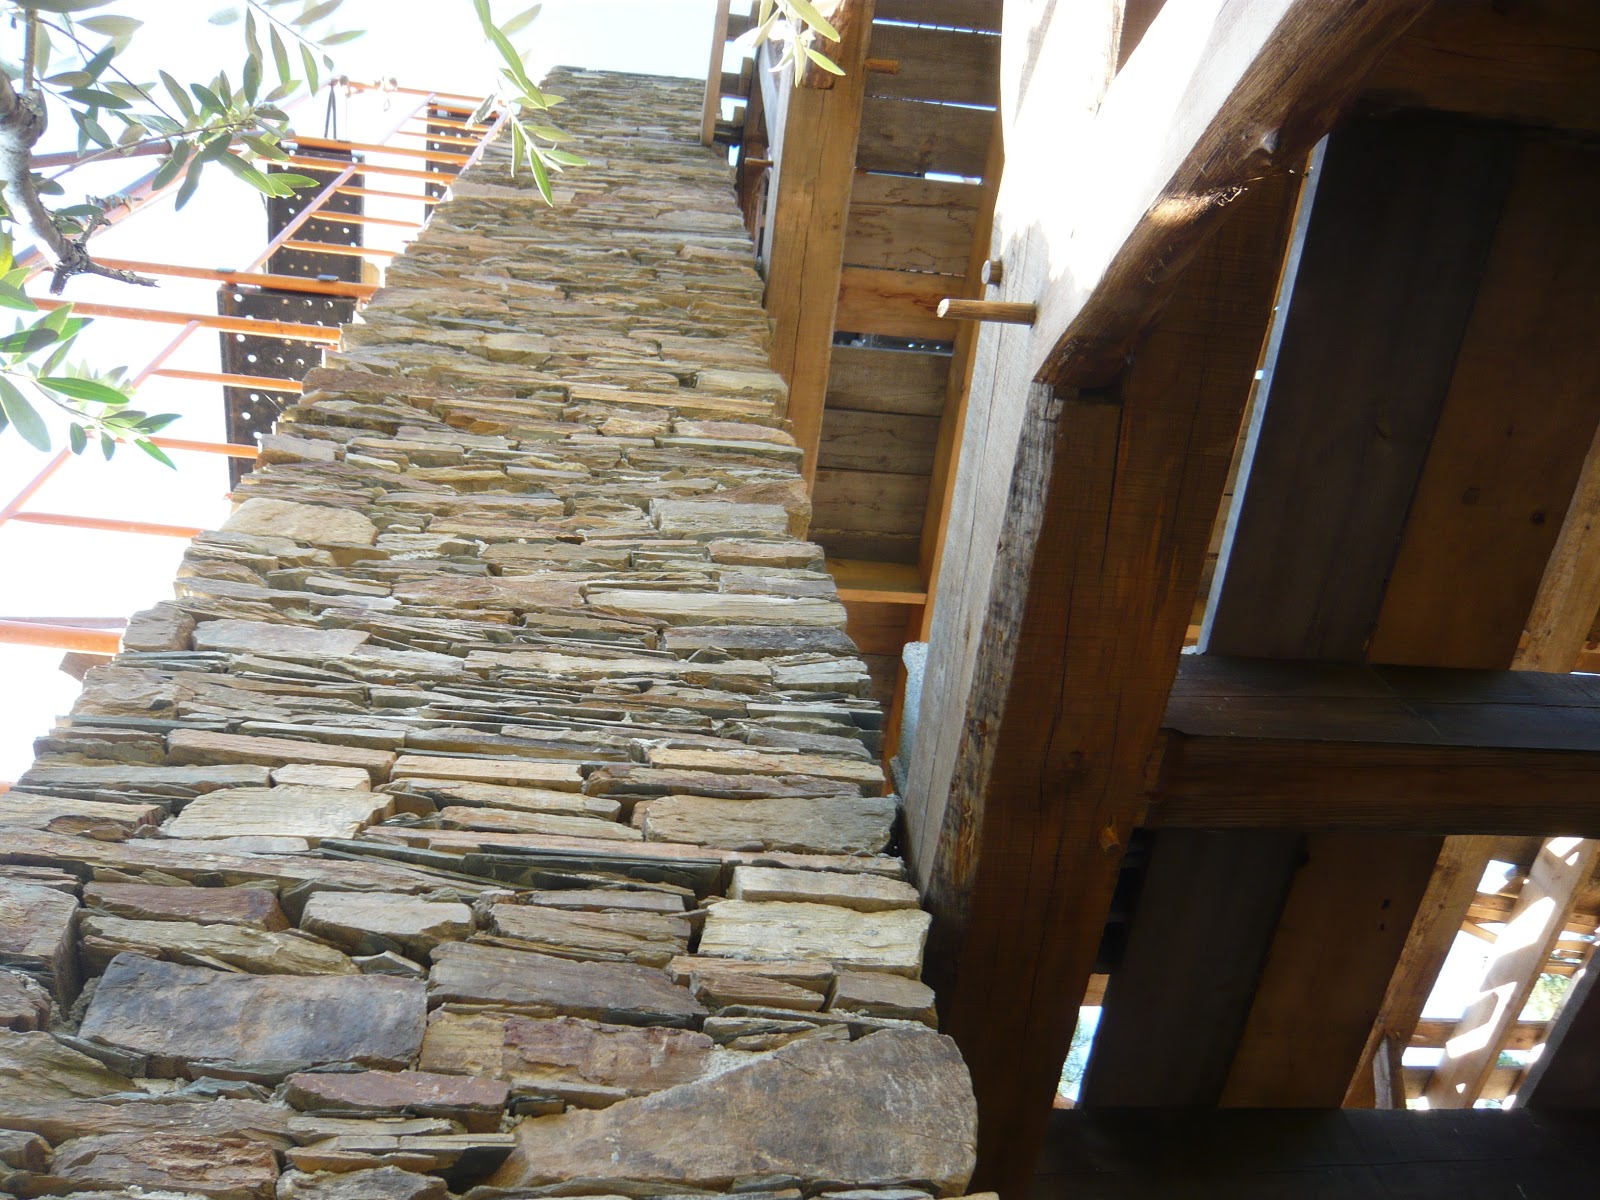
i thought long and hard about what kind of chimney i was going to build and how? somewhat governed by the availability of materials i guess it was always going to be from schist/slate. as it turned out it involved a fair amount of block work as well, and i varied the stone with bits of granite, quartzite when i could find them, and sandstone.


had i had more confidence in my ability at the start, i would have done without the block work, and just built in stone. also i could've forgone using clay flue liners, particle insulation and heat resistant mastic, and just plastered the flue with clay as i went. this would have reduced the over-all cost of the chimney considerably, and kept it closer to the intention of using only natural materials where-ever i could.


i hewed some very meaty walnut beams for the mantels and chestnut for lintels, where they wouldn't come in direct contact with heat. based on the idea that even in the event of a chimney fire they would withstand longer than either steel or re-inforced concrete.

in the end its been a 2 and 1/2 month marathon to get it done. it was built the old way, with a pile of rocks and a bucket winch, a trowel and a level, even the muck i mixed by hand, i wasn't using enough per day to warrant putting the mixer on.

the stack is 2.2 meters wide by 1.1 meter deep and about 10.5m high from the foundation.

i can only hope the rest of the house gets finished so there can be a house warming, with the first fire lit of the house, in the proper way of things.

Thursday, 31 May 2012

painting a kilometer of wood

We wanted to weather/insect and fungus proof the house a long time ago, we tried making pine tar for the job, which did work, but we realised we would need so much of it and the only way to make huge amounts was not only time inefficient but also required fire and at the time we were in a serious drought and a fire ban......then the rains came.  So, we ordered some stockholm tar (which is essentially the same thing) and mixed it with linseed oil and diesel to make our own preservative.

Other than keeping the workforce (of one) fed and watered and working on the rest of the farm, I haven't been able to help much with the build so it seemed only right that I paint the house. It's been a mucky job and tricky, reaching in and around inaccessible places, hanging off of bits of frame and leaning into the abyss, at times just down right dangerous but nothing compared to what rick has to go through on a daily basis.


Wednesday, 16 May 2012

shakes and shingles

- this may sound like a post about some form of illness, but in case you didn't know it is actually about an ancient form of roof covering. hundreds, if not thousands of years of tradition.

shingles are sawn timber roof tiles, usually 16" (400mm) or more long, and random widths, laid tripple lapped. generally they're made from cedar and some species of pine or chestnut and oak. shakes are split instead of sawn, which gives them a better natural resistance. it also gives them a rustic appearance, and because of the way they are made, they are usually available only in narrower widths (50-175mm)

i've hankered after using shingles or shakes for years, and now i have an opportunity. i like the woodsyness of them, i like the naturalness of them, their beauty, the way they age (silvery). i like how easy they are to make (shakes not shingles), that they are one of the only kinds of renewable roofing materials. and that, from the woods themselves i can make another essential part of the house. of and from it. they are the woods.

the process of making shakes is quite easy. you don't need many tools, a froe ( a special tool for splitting) a wooden club to hit the froe blade with, and an axe for trimming. having felled your poles, cut the blanks (the rounds of timber also known as bolts from which you will split the shakes), and debarked them, begin by splitting them in half, then quartering, then subdividing. you should be able to subdivide somewhere between 32nds and 64ths, for most bolts.


you can also split them right across the diameter of the bolt, which, because of the difficulty of obtaining anything from it, is called a bastard shake.


rounds much less than 200mm diameter wont make very big shingles, so you will need subsequently more of them. fresh growth on a coppiced stump is the best. somewhere between 20-30 years is ideal. past 50 years and its over-stood, and probably suffering from one or more defect, like heart rot, or shakes (radial splits). shingles are an easy to manufacture solution to roof covering, they take less material than thatching, are lighter than most other forms of roofing material (particularly clay or concrete tiles, or stone slate), easy to install, and very durable. you could expect up-to 70 years out of a shingle roof before it needs re-roofing, about the same as you would expect from slate, and more than you would from clay tiles. the church of east greenstead in essex, england, is one of the oldest surviving timber frame buildings anywhere, and like many other early churches in northern europe (especially stave churches, which to some extent it resembles) it has a shingle clad spire.

why i chose chestnut, was principally because we had some (enough as it turned out for 2500) and it is more durable than pine which i also considered. although i would have had enough pine to do all the shingles i could ever imagine doing, it still would've needed treating with a tar based product to prevent insect ingress or fungal growth.


in the end we traded some labor for raw materials, so all the 7000 shakes cost us was about 5 litres of petrol and some oil for the chainsaw. well that, and the physical toll on me, which was not inconsiderable. i wouldn't want to make them everyday, put it that way.

why 7000? well that's what estimated it would take to cover 100m2 of roof, and how long did it take? including felling, hauling out of the woods, making, and stacking, 40 days and 40 nights, how very biblical, how very appropriate.

Saturday, 7 April 2012

timber framing

you don't always end up where you'd anticipated.

this is never more true than when you are building. plans invariably change. ideas co-allese. priorities shift. it is the nature of things to evolve.

when buildings evolve during the process of initial construction, it can mean re-doing things, unless you are fortunate enough to have pre-empted the change, or are building in such a way that allows for change.

the second phase of constructing this timber frame wasn't easy. what is? there is a phrase in construction known as incremental error, build enough, and you will find it sooner or later. the key to it, is how you overcome it. sometimes it just means stopping it and other times it means undoing, and or, adjusting things.

when i started this frame i had certain reservations about how i was going to be able to put the frame up, those reservations didn't subside until i had essentially finished. until then it was all hypothesis. only in the pudding was there ever going to be any proof.

much of the process of construction for the second phase was the same as the first.

several of the parts are essentially acting in the same way. however, at the first floor, whereas the most external lateral intersecting beams (girts) ran from post to post (in the same way as the 1st floor floor joists),


at the loft level there are two 8x10 roof plates scarfed and pegged together, that run the full length of the building, front and back. housed into these plates are the tie beams (the first part of the roof truss), which run from the front to the back plate.

because i didn't have a crew of 56 people or a crane i had elected to half the posts, essentially building in a more modular way, a way i could manage on my own. this caused me a series of problems i needed to overcome. principally it meant the need for additional support for each of the posts, particularly at the point where they intersected, as i was creating what is known as a nodal point (a point of compressive stress that wants to act like a knee) and i needed to restrain it.

this meant the addition of knee braces throughout the structure, where they had not been allocated in sobon's design, and the pegging of all the first floor joist ends to effectively create a raft of floor joists, girding beams and girts.


subsequently, i have thought that a slightly different system might have been preferable, to have treated the first floor post-tops as above and used beams in the manner of roof plates to house the posts more stiffly, which would've obviated the need for all the additional bracing, and reduced my build time. however, at that time i had issues with doing it that way, firstly and most importantly, i didn't have sufficient material, and secondly i had joinery conflicts there, and strength issues if i'd changed the choices of joints.

as it was, each of the top section posts had a mortice housing underneath the post that had to correspond with a tenon on the receiving post from the floor below. beginning to sound complicated?

it was imperative that all the posts lined up, so that the plates could line up, so the roof line would be continuous. this is where the possibility of incremental error is likely to rear its ugly head. get one thing out, lower down the sequence, and it throws everything else out of true or square, or plumb. this was exactly the scenario i was facing as a shift in the line of the lower posts had occurred, and since it wasn't possible to shift the frame back into perfect alignment (i tried, but it was too well secured and too damn heavy), it meant altering the point at which the top posts sat on their corresponding tenon below, to avoid continuing or worsening the error.

braces were cut, then posts and beams had brace mortices let into them.

the braces and posts needed to fit exactly into the roof plates with millimeter accuracy in order for everything to line up, which meant they had to be pre-assembled.


the posts were then set out on their new line and braced


the roof plates had to have long and complicated scarf joints to make the span (approx 9m),


the 8 post tops had a 4" (100mm) x 1 1/2" (37.5mm) tenon that ran the full width of the post, this was to locate into the underside of the roof plate, since both the front and back plates were in two parts that were joined by a long and complicated scarf joint it meant there really couldn't be much play in the mortice housing, no more than 5mm between the 2 posts per length of plate, or put it another way, each post was only allowed 1.25mm play either side laterally within its unique housing, and less than 1mm from front to back (that means tight enough to need drifting in).


i pre-assembled each pair of posts, their respective braces, and the roof plate they all housed into, to make sure everything fitted well. knowing that when the posts were in and i was lowering the plates onto them would not be a good time to have to adjust the fitment.

the process of getting the plates in was nervy, to put it mildly. the plates weighed a lot, they had to be suspended in mid air, with a makeshift scaffold, and eased onto the post tops one at a time, lowered and tapped down until they fit, then lifted out enough to get the braces in, re lowered and sent home. which probably sounds easy, but when you have a 5m beam that weighs several hundred pounds swinging around, willing itself to slip out of its sling, and fire you off the scaffold and down to the ground 8m below, was pause for thought.


the first plate each side was relatively easy compared to the second. as that not only had to line up with all the post top tenons and braces, but the scarf joints had to line up aswell, these joints were over 2ft long, and had to fit as tightly as possible.


the really awkward part of this is that you can't tell if there is any twist in the plate over its entire length that is going to affect how both halves of the scarf joint will fit together. it only has to have the tiniest set and they won't go together, not when they are housed into numerous other components. even though i had pre-assembled the scarf joints together, it was always going to be a slightly different story when the plates were sat on-top of the posts in situ.

in the end it all went well.


preparation was the key.


following getting in all the roof plates, it was time to drag the nearly 21' x 8x10" (7m x 200mmx250mm) tie beams down the side of the mountain, one at a time, mount them on the scaffold, the set out the cuts.

the roof plates had one half of the connecting dovetail joint (the female half) and additionally a step housing on the internal face.


the tie beams had the male half of the dovetail joint which would tie them into the plates, and the male part of the step housing, set below the dovetail.


the complication here was again the need for everything to fit exactly, and without play. if there was play in the joint it would've been sloppy and the dovetail would not have acted as it needed to, to tie the building together at this point. too tight and the beam wont go in. you can't crush the fibers of the joint trying to force it in as it prevents the beam from housing properly. you can't even kerf cut the beam into the joint, as there isn't room to get a saw in. it has to be set out and cut right.

some of the dovetail joints had to be off-set and resized, as the wane in the face of the plates, and in one case the proximity of a scarf joint prevented it from having a full dovetail.


the tie beam also had braces, that ran from each post to the underside of the tie beam. these all had to be cut and housed and tried prior to insertion.


the scaffold had to be built to raise each tie beam in turn. to take it out past the front of the frame in order to bring the tail end back over the top of the plate. this was an awkward manouver. following this, the tie beam had to be raised and then lowered into position into the corresponding dovetail joints and housings. this meant it had to contact four different joints with millimeter perfect dimensions in order to fit. once the tie was in there was no real way it wanted to come out. whilst this occurred it was necessary to insert the braces in their respective housings. since i was doing this on my own it meant tying in the braces as the beam was being lowered, so they didn't fall out of place.


when everything was set down, it was time to drill and peg the joints.


the principal rafters.


up to this point i had been generally following jack sobon's book. from here on in it wasn't going to help as i had other issues to deal with that he didn't. i plan to build a room at the back of the house that will become the bathroom. the roof of which i plan to segue into the main roof (at a different pitch to the main roof) and join-in part of the way up at the back.

this meant that i would be putting additional load on the roof. rafter dimensions and construction is generally based on estimated load. this is derived by two things live and dead loads. a dead load is a static load, such as the weight of the materials that go to make a roof. and a live load is that which acts upon the roof, such as snow, or more likely in my case, wind.


in order to increase the carrying capacity of my roof, without increasing the rafter number or size, i felt it would be appropriate to add in principal rafters. together with collar ties, and queen posts. the point of the queen posts is that they help to transfer part of the load through the frame. in addition i put in purlins and windbraces. all of these additions help to stiffen the roof, to prevent collapse of the rafters, or spread of the walls, and to help prevent the rafters from racking (lateral and downward movement in a domino effect).

where the collar ties went was a matter of judgement. i felt they wanted to go up somewhere between a third and half way down from the apex of the roof. so i set the rafters out on the temporary deck on the first floor, and layed out where i wanted the collar ties and queen posts to go. moved them around on the layout until i felt they looked right. it was a feeling thing, not a measuring thing. the collar ties i felt needed a thru mortice, even thou they were only there to prevent compression, the action of the timbers drying could twist them out of alignment if the collar tie tenons were not deep enough into the rafters.


the queen posts were of a much smaller section and i felt could be restrained the same as all the other braces with a 3" (75mm) tenon the depth of the post.


each pair of principal rafters was pre-assembled with all joints finished.


this included a thru mortice and tenon connecting joint at the apex. when ready each pair was dis-assembled, then lifted in section and set into position.


finally, when all assembled they were pegged.


the last part of the main part of the roof structure was to cut and assemble purlins (the logitudinal beams that run under the rafters, connecting them together), they were clasped into the collar ties where they met, and additionally held thru the rafters, and by windbraces.


the windbraces keep the spacing between the pairs of principal rafters, and help to prevent racking from wind load acting on the gable ends of the building.


cutting roofs is my favorite thing in carpentry, i don't think there is anything better.


it is more than the end of the frame, it is the culmination of a lot of hard work, often the most complicated part, and the most rewarding, for me the roofing carpentry makes sense of the building.


in a previous post i suggested that there was something to be found in hard manual work, that it gave you certain understandings. it does something else too, it gives you a sense of fulfillment, and satisfaction at having achieved something, it gives you value, it gives you worth in a way that is different from any other way of achieving it.


making a shelter, providing warmth, nourishment, safety, these are the five principal basic needs of survival. fundamentally, building achieves these needs.


if you asked me why build with timber? or why did i choose to build with timber in the way i have? there are many answers i could give. its the material i have a lot of, its the material i know best, but i think the most honest answer from my point of view is its because it felt right. and it still does.